Showing posts with label side dish. Show all posts

Thursday, August 30, 2012

Pasta with bread crumbs

Yes, this sounds simple and plain, but really I liked it.  I may have over crisped my bread crumbs a bit.  I didn't mind, (they definitely weren't burned) but 2/4 boys said they were either too crispy/tasted burnt.  Benjamin LOVED this.  He was so excited to have had 2 dinners this week that he really liked.  Even had seconds.  It truly is super simple.  I think if I had not toasted the bread crumbs as long I would have had 4/4 liking this dish.
Other tips for next time - don't add the olive oil to the butter - just add it all to the pasta, and unless using the good Parmesan, I think I could probably have doubled the amount of Parmesan.  (at least 1 1/2 times.)
I doubled this from the original - feel free to cut in 1/2.  I did have a decent amount of left overs, but DH did not eat dinner with us and I didn't know that when preparing.
As is, serves 12 as a side dish, 8 as a main

Ingredients

  • 1 16 oz. package short pasta (I used ditalini just because it was the only thing I had a complete package of other than spaghetti - time to go shopping.)
  • 4 Tablespoons butter
  • 4 teaspoons olive oil
  • 6 cloves garlic, minced
  • 2 cups coarse soft bread crumbs (4 slices of bread for me - I just tore them up and pulsed them in the food processor until crumbly.)
  • 1 teaspoon dried Italian seasoning
  • 1/2 teaspoon sea salt
  • 2/3 cup (I'd use at least 1 cup next time, maybe 1 1/3) grated Parmesan cheese
Directions
  1. Cook pasta according to package directions.  
  2. While the pasta is cooking, melt butter in a large skillet.  Add 2 teaspoons of oil (may omit this next time) and the garlic.  Cook for 1 minute, stirring frequently.  Add the bread crumbs, Italian seasoning, and salt and stir to coat the crumbs with the butter.  
  3. Cook and stir until crumbs are browned and crisp (6-10 minutes.)  Remove from heat and set aside.
  4.  When the pasta is done, drain, return to the pot and toss with 2 teaspoons of olive oil (I'd use a bit more next time.) and the Parmesan cheese.  Stir to mix.  Just before serving, stir in the breadcrumbs.  

More notes --
I actually really worried that the crumbs wouldn't be crisp enough - part of the getting them too crispy problem.  I also added them right before I planned to serve this only to have a child knock a glass butter dish on the floor and I had to stop and clean the mess.  Luckily the pasta wasn't any worse for the wear.  The crumbs held their crispiness.  As left overs, the breadcrumbs are no longer crisp, but are not mushy either.  Totally still edible, and seem to have an even more intense buttery garlic flavor.  

Monday, June 4, 2012

guacamole and pico de gallo

I know I said that 7 layer dip would be the next post, but to post on 7 layer dip, I felt I had to post the guacamole recipe we use.  Honestly I have to admit that we totally cheated this time around because we just used salsa, but we do normally make guacamole following this recipe.  I'm including our pico de gallo recipe becasuse it seems like everyone would know what it is so it doesn't merit it's own post.  However, in case you don't, or I ever forget the proportions, I've included it here.

Again, no picture - other than as part of 7 layer dip.

Ingredients

  • 3 avocados (Hass medium), 
  • 1 Tablespoon lime juice (freshly squeezed)
  • 1/2 cup pico de gallo (see below)
  • 1 1/2 teaspoon garlic, minced (3 cloves)
  • 1 teaspoon olive oil
  • 1 teaspoon jalapeno, stemmed seeded and minced
  • 1 teaspoon salt
Directions
  1. Pit avocados.  Score without going through the skin.  Scoop dices our into a mixing bowl.  Add the lime juice and stir to coat.
  2. Stir in the remaining ingredients and stir and mash until desired consistency is reached. 
****Tip - We learned this awesome tip a while back - if you toss an avocado pit in with the guacamole it will keep it from going brown.  

~~Like I said, today we totally cheated.  I love the Jack's Special fresh salsa that they sell at our costco.  It has a nice limey flavor.  We just subbed that for the jalapeno, pico, and lime juice.  I'm pretty sure Brandon still added a bit of garlic, the olive oil, and salt to taste.  But like I said, I share the recipe because it is our go to guacamole recipe.

Pico de gallo
Ingredients
  • 2 cups (1 pound) tomatoes, diced
  • 1/2 cup white onions, diced
  • 2 Tablespoons chopped cilantro
  • 1 1/2 Tablespoons jalapeno, stemmed, seeded, and minced
  • 2 teaspoons lime juice (fresh is best)
  • 1/2 teaspoon salt
Directions
  1. Combine all ingredients in a bowl.  

Tuesday, May 1, 2012

cucumber salad

One of my favorite things about my book The Six O'clock scramble is the simple side dishes section at the back.  Often she will have something listed from the back.  They really are super simple.  Probably my favorite thing about them is that when I'm getting super sick of salad but want a raw veggie, simple side for my meal that isn't salad, I can turn there and look for an idea.  This is one of those ideas.  I will share her cucumber salad, and then a cucumber/tomato salad that I made a lot on my mission.  Don't do it anymore, but ate it tons then.

Cucumber salad (#1)

  • 3 cucumbers, seeded and sliced.  
  • 1/4 cup feta
  • about 15 mint leaves, chopped
  • 1 teaspoon honey
Combine in a bowl and serve.  


Cucumber salad (#2 - or with tomatoes)
  •  1-2 cucumbers, seeded and sliced
  • 2-4 tomatoes (depending on size), sliced
  • splash of vinegar (your choice, but even plain works well - especially with the seasoning)
  • garlic mix type seasoning such as Mrs. Dash garlic, garlic and parsley.....
Combine cucumbers and tomatoes on a plate.  Sprinkle with garlic seasoning.  Toss with a splash of vinegar and serve.

Friday, September 30, 2011

Orange cottage cheese salad

Sometimes I have to admit I'm a bit wacky.  I go on these "we should eat healthier" kicks and then I post a recipe like this.  But hey it is a fruit.  Actually I checked out deals to meals and did a free trial and actually made 1 week of their food.  This recipe is from there, but in no way original I'm sure.  I've seen it at a multitude of church functions.  I'm actually not sure how I've never managed to make (or possibly even eat) this salad before.  I think I've had the orange jello salad with marshmallows but never the cottage cheese version.   I actually really liked it - as did all of the kids (except picky toddler.)


Ingredients

  • 1 16 oz cottage cheese (IMHO it has to be Breakstone - one of the few ingredients I'm super brand specific on.)
  • 1 small package orange gelatin 
  • 1 8 oz container cool whip
  • 1 8 oz can pineapple tidbits, drained 
  • 2 11 oz cans mandarin oranges, drained.
Directions
  1. Pour cottage cheese and jello into a bowl.  Stir and mix until jello is evenly mixed into cottage cheese.  
  2. Fold in drained fruit and cool whip.  Keep refrigerated until ready to serve.

Monday, June 27, 2011

Cauliflower Bake

This is the second meal in a week that I have actually been a little bit worried to taste or try.  Who knows what possess me to try things I'm not even sure I'll like.  Mostly it is curiosity.  I don't think I've posted the other one yet, so I'll make it my next post.
This meal comes from $5 dinner mom's book.  It was so plain that I was very worried.  The book didn't even give amounts on salt and pepper.  I was totally afraid it was going to have absolutely no flavor with just salt and pepper so I added cinnamon and then worried that the cinnamon wouldn't go with the other flavors.  My debate was either cinnamon or garlic/herb and onion or something.  I chose cinnamon thinking  it might work out because it was like an apple pie with cheese.
Anyway, the dish turned out fine.  I could taste the salt and the cinnamon, but not the pepper.  Not too bad for a vegetarian meal if you ask me.  I was pleasantly surprised.  However, it doesn't rank up there as one of my all time favorites either.  Tavio hated it - made gagging noises all through the meal, but everyone else ate it just fine including the fussy 2 year old.  I think he actually ate about 4 bites.  That is a lot for him for a casserole type dish.  Yea!

Ingredients

  • 1 large head cauliflower, chopped into bite sized pieces
  • 3 Tablespoons flour
  • 16 oz. cottage cheese
  • 1/4 or 1/2 teaspoon salt (can't remember if I threw 2 or 1 1/4 teaspoons in there.)
  • Dash pepper (1/8 teaspoon max)
  • 1/2 teaspoon cinnamon
  • 1 handful shredded cheddar cheese
Directions
  1. Steam cauliflower pieces for 5-6 minutes.
  2. Preheat oven to 350.  In a large bowl, mix together flour, cottage cheese, salt, pepper, and cinnamon.  Stir in cauliflower.
  3. Pour into an 8 X 8 dish.  Sprinkle with Cheddar cheese.  Bake for 20-30 minutes.  (directions said 20 minutes until cheese turns "golden brown" - That never really happened even after 30 but I took it out not wanting to end up with soggy cauliflower or anything.)

Monday, May 30, 2011

Cranberry cole slaw

This was a simple cole slaw that was suggested in my no whine with dinner book to go with the pulled pork in the previous post.  However, I totally forgot to make it that day.  We did have it the next day because it looked so simple and good.  It was.  Nice simple cole slaw and good too.

Ingredients

  • 1/3 cup light mayonnaise
  • 3 Tablespoons cider vinegar
  • 3 Tablespoons pure maple syrup
  • 1/2 teaspoon kosher salt
  • 1 16 oz. package cole slaw mix
  • 1/2 cup dried cranberries
Directions
  1. In a large bowl, stir mayonnaise, vinegar, syrup and salt together until smooth.  Add cole slaw and cranberries.  Stir to coat.  Serve.

Friday, May 27, 2011

Octoberfest German Potato Salad

I wanted a potato salad the other day to use up some potatoes and because it seemed like it would go very well with our pulled pork sandwiches, so I went searching for one.  I found this one on Allrecipes.com.  I love that site just for all of the reviews.  Makes it so much easier to choose something.  This was a super simple salad, and honestly I worried about it having enough flavor because it didn't have many ingredients, but it was quite tasty, especially after it had sat for a while, cooled, and the flavors had blended.  I even left out the oil in the original recipe figuring it looked like it had plenty of liquid, and I was right.  It had plenty of liquid and didn't need the extra oil.

Ingredients

  • 3 pounds potatoes, sliced (I used red potatoes and did not peel them.)
  • 1/2 cup chopped onion
  • 2 teaspoons salt
  • 1/2 cup mayonnaise (I used lite-the olive oil one)
  • 1/2 cup cider vinegar
  • 2 Tablespoons white sugar
  • 2 Tablespoons parsley (I used fresh)
  • ground pepper to taste
Directions
  1. Cook potatoes in a large pot of salted water until firm but not mushy.  (15-20 minutes)
  2. In another bowl, whisk together salt, mayonnaise, cider vinegar, sugar, parsley, and pepper.  Stir in onions and potatoes.  Let sit for at least 1 hour to let flavors blend (although I'm sure I didn't originally, but the left overs were tastier after flavors blended.)

Sunday, May 22, 2011

Chili crusted sweet potato fries

I made these to go with the tilapia, and the picture for these is even more pitiful than the others. The original recipe is also from no whine dinner.   Unfortunately I ended up leaving these in the oven too long because I didn't stick a timer on them thinking I'd only leave them a couple of minutes more.  I was going for crispy, and although the recipe promised they would be crispy due to the cornmeal, I was still hoping for a crispier fry.  While the corn meal did add a depth of texture, it didn't hit the spot for the "crispy" that I expect from a fry.  I haven't been able to truly find a baked recipe that does that, but I continue to look.  However, even having said that, these were gobbled up by the family and everyone wanted more (except picky 2 yr. old who used to like these but now only gags if I attempt to feed him any.)
I made some changes in amounts because my sweet potatoes were huge, and I even added a bit of oil - hoping for more crispiness.  Maybe I'll have to try them using the exact recipe.  They also weren't too spicy.  I had mildly reduced the chili powder and I would not need to do that again.  I also used a full egg, and the original was 2 egg whites (no oil)  But, I think I was out of eggs and used powdered eggs - I'd love to try these again with egg whites and see how they come out.  Then I will have to modify my commentary.  I'm sure no one will complain.  They all love sweet potato fries.

Here is my version:

Directions

  • 2 sweet potatoes (mine were enormous)
  • 4.5 Tablespoons cornmeal
  • 1 Tablespoon sugar
  • 1/2 teaspoon chili powder
  • 1 teaspoon cumin
  • 1/2 teaspoon salt
  • 1/4 teaspoon onion powder
  • 1/4 teaspoon garlic powder
  • 1 egg
  • 1/2 teaspoon oil
Directions
  1. Preheat oven to 425.  Oil, or coat a large rimmed baking sheet with nonstick spray and set aside.
  2. Cut the sweet potatoes in half lengthwise, then cut each half into 6 wedges, and cut the wedges in half, lengthwise so you end up with 48 fries (that works if using medium sweet potatoes.  I had to just keep cutting them to a nice fry size.)
  3. Whisk together cornmeal, sugar, chili powder, cumin, salt, onion powder, and garlic powder in a large bowl.
  4. In a separate bowl, whisk egg with the oil until frothy.  Add the fries and toss to coat evenly.
  5. Add the sweet potatoes to the cornmeal mixture and toss until lightly coated.  Place on prepared baking sheet and spray with cooking spray.  
  6. Bake until golden brown on the bottom (about 12 minutes.)  Remove from the oven, turn each fry with a spatula or tongs, and bake until slightly crisp on the outside and soft on the inside, 10 to 12 minutes.

Saturday, February 5, 2011

Microwave mac 'n' cheese

So today's meal was some bbq ribs in the slow cooker Thanks to my taste of home magazine.  It had this mac 'n cheese recipe listed for "on the side."  I have yet to try a microwave mac 'n cheese so how could I resist trying this one.  It was Awesome!  Glad we tried it.  I am posting it first because I did make some changes and I don't want to forget what I did.  I loved that this cooked while the ribs heated in their bbq sauce.  Worked out perfect.


Ingredients

  • 2 cups elbow macaroni (I used a Barilla - I love their pasta and their elbows have a cute little twist.)
  • 2 cups hot water
  • 1/4 cup butter
  • 1 Tablespoon dehydrated onions
  • 1/2 teaspoon salt
  • 1/4 teaspoon ground mustard
  • 1/4 teaspoon pepper
  • 1 1/4 cup milk (I used fat free)
  • 1/3 cup flour
  • 6 oz. 2 % velveeta
  • 2 oz. sharp cheddar
Directions
  1. In a medium large microwave safe dish (I used a pyrex bowl) combine macaroni, water, butter, onion, salt, pepper and mustard.  (I just stuck the cube of butter in the middle without doing anything to it - seemed to work fine.)  Cover and microwave on high for 3 minutes (I only covered it with the little cover I use to cover a plate when reheating - it fit right on top of my bowl - not tightly or anything, but again, seemed to work fine.)
  2. Stir.  Cover and cook at 50% power for 3 minutes.  
  3. Meanwhile, combine flour and milk.  Gradually stir milk mixture into macaroni mixture.  Add cheeses.  
  4. Cover and cook 3 minutes, stir, cover and cook 3 minutes.

Sunday, January 23, 2011

broccoli with creamy Parmesan sauce

Here's the final recipe for today's food.  It was our veggie.  I liked it a lot.    DH did not drizzle it over the broccoli, he just poured it all together.  Not nearly as pretty of a picture as on the eating well website or in my magazine.  We also used frozen broccoli florets making it super easy - no peeling the stalks and chopping the fancy way the original said to.
I liked this recipe as well.  I would say if you like Parmesan, and you like cheddar broccoli, then you would like this.  It is just a  variation on a cheddar covered broccoli.
Here is the simplified version of the recipe.

Ingredients

  • 1 pound frozen broccoli florets
  • 1 Tablespoon flour
  • 1 cup nonfat milk, divided
  • 1/2 cup freshly grated Parmesan cheese
  • 1/4 teaspoon salt
  • pinch ground white pepper
  • pinch ground nutmeg (optional -I didn't taste it, so I think DH didn't use it.)
Directions
  1. Steam the broccoli in a steamer for 5-7 minutes.
  2. Meanwhile, whick flour and 1/4 cup milk in a small bowl until smooth.  Heat remaining 3/4 cup milk in a saucepan over medium-low heat until steaming.  Whisk in the flour mixture.  cook, whisking until thickened, 2 to 4 minutes.  Remove from heat; add cheese, salt, pepper and nutmeg.  Drizzle over broccoli.  (or just pour it all together like we did.)

Sunday, January 16, 2011

brown rice pilaf

Yet another recipe from my simple and delicious magazine.  Can you tell that is the one I'm flipping through right now adding all that I missed in the past couple of weeks?
I liked this pilaf other than the fact that my brown rice was a bit old, and tasted it.   It kind of ruined the dish.  Would have been nice had the rice been fresher.  It was probably 2 -2.5 star like we had it, but would be 4 star with fresh rice.   I know to use up regular brown rice quickly, but I apparently don't use the instant stuff very regularly at all.

Ingredients

  • 1/4 cup chopped green onion
  • 2 teaspoon butter
  • 1 1/3 cup instant brown rice
  • 1/3 cup walnuts
  • 1 1/3 cup water
  • 1/3 cup dried apricots, thinly sliced
  • 1/4 teaspoon salt
  • 1/8 teaspoon pepper.
Directions
  1. In a small saucepan, saute green onions in butter until tender.  Add rice and walnuts;  cook and stir for 1-2 minutes or until walnuts are toasted.  Add the water, apricots, salt and pepper.  
  2. Bring to boil.  Reduce heat;  cover and simmer for 5 minutes or until liquid is absorbed.  Let stand for 5 minutes.  Fluff with a fork.

Thursday, November 25, 2010

Cheddar mashed potatoes

I saw this in my Taste of home healthy cooking magazine a month or month and a half ago and have been waiting to try it.  It seemed very interesting to me because it used a bunch of regular potatoes and 1 sweet potato, and also looked like it had some tasty spices.  It did not disappoint.  Really we were lucky this year.  Everything turned out so well.  Very good food for all of Thanksgiving. I made a couple of changes - I'll mention them in the recipe though.  I thought I had taken a picture of the potatoes, but I guess not.  This is the best I could do.  A picture them on the plate with the rest of the Thanksgiving dinner.

Ingredients

  • 3 3/4 lbs. Yukon Gold potatoes, peeled and cubed (I just used russet.  It is what I had.)
  • 1 large sweet potato, peeled and cubed
  • 6 garlic cloves, halved
  • 1 cup (8 oz.) reduced-fat sour cream 
  • 1/4 teaspoon dried thyme
  • 1 1/2 teaspoon salt
  • 1/2 teaspoon pepper
  • 2 cups shredded cheddar cheese, divided
Directions
  1. Place potatoes and garlic in a large saucepan and cover with water.  Bring to a boil.  Reduce heat; cover and cook for 10-15 minutes or until potatoes are tender.  Drain.
  2. In a large bowl (I threw them in my mixer) mash potatoes.  Stir in the sour cream, thyme, salt, pepper and 1 cup cheese.  Transfer to a 9 X 13 pan coated with cooking spray.  
  3. Sprinkle with remaining cheese.  Bake, uncovered at 350 for 10-15 minutes or until cheese is melted.

Apple sausage stuffing {slow cooker}

Finished eating round 1 of Thanksgiving so I guess I need to start blogging the recipes or I'll be sure to get plenty behind.  Some of the things we made were tried and true.  I made some green beans (although I didn't steam them quite long enough and I thought I'd be lazy and melt the butter in the microwave and add the beans and stir - they didn't get coated nearly as well.  Not such a good idea.)  I also made my mom's rolls.  Sooo good. My kids call them Grandma's rolls.  Yum!  Made a double batch last night and made 1/2 into cinnamon rolls for breakfast.  1/2 for rolls for lunch.
This is the first recipe I clicked on, so it gets to be the first one blogged about.  I found this at crockpot 365.  It was surprisingly good.  We made it a bit more time consuming than necessary because we made bread for it yesterday, then homemade sausage today, but normally it wouldn't take quite that much time.  Definitely worth the effort, and not as time consuming as another stuffing recipe I have.  I like that it used regular bread. I also loved the flavor of the sausage and the apple.  They really complimented each other well.  I worried it would be soggy because Brandon decided to broil the bread rather than follow directions and he didn't turn them, but it turned out just fine.

Ingredients

  • 12 cups  bread cubes (I used homemade wheat bread this recipe today)
  • 8 oz. ground pork sausage (we used a homemade breakfast sausage recipe)
  • 3 Tablespoons butter, melted
  • 1 1/2 cups chopped Granny smith apples
  • 1 1/2 cups chopped onion
  • 1 1/2 cups chopped celery
  • 1 1/2 teaspoons rubbed sage
  • 1 teaspoon salt
  • 1/2 teaspoon pepper
  • 1/2 cup chicken stock, plus and additional 1/4 cup if desired (we did not use the extra 1/4 cup.  Those wanting more liquid added gravy.)
Directions
  1. Use a 6 quart slow cooker (or larger if you have one - this barely fit in my 6 quart.)  Cut the bread into 1/2 inch cubes and bake it at 350 for 20 minutes, flipping once, or until bread is golden brown and toasted.  (Alternately DH Broiled it on high for 10 minutes and didn't flip it.  But he did have it on a middle rack.)
  2. While bread is toasting, brown the sausage and drain.  Toss the bread cubes and sausage together in the slow cooker and pour in melted butter.
  3. Add apples, vegetables and seasonings.  Stir to mix well.  Pour in 1/2 cup chicken stock and stir gently to coat bread and veggies with broth.  
  4. Cover and cook on high for 2 to 3 hours.  Done when bread is browned on the top and edges, and the vegetables are tender.
  5. Stir well and keep on warm until ready to serve.  Add additional 1/4 cup chicken stock before serving and stir again if desired.


Friday, November 19, 2010

simple spanish rice

I went looking for a red spanish rice recipe to use rather than some box mix and this is what I chose to try mostly because it was super easy, but also because it was well rated over at allrecipes.  It was surprisingly good.  I really expected it to taste a lot more like rice with salsa but something about adding the chicken broth makes it work and taste good.  I did c ut the oil in half and change it to butter because I really like onions sauteed in butter, but that is all I changed.  (sorry, not the best picture)

Ingredients

  • 1 Tablespoon butter
  • 2-3 Tablespoons chopped onion
  • 1 1/2 cups uncooked white rice
  • 2 cups chicken broth
  • 1 cup chunky salsa (I used a mix of Pace and store brand mild)
Directions
  1. Heat butter in a heavy skillet over medium heat. (I actually used a saucepan.)  Stir in onion and cook until tender, about 5 minutes.  Add rice and stir until coated with butter.  
  2. Stir in chicken broth and salsa.  Reduce heat, cover and simmer 20 minutes, until liquid has been absorbed.

Saturday, November 13, 2010

Green rice Casserole

This is the side I chose to make with our Chinese pot roast - also from the fix it and forget it cookbook.  I am a bit interested to see how it turns out or if I will like it.  I'm actually worried I won't like so much parsley, but we will see.  It isn't even in the crockpot yet, the rice is in the rice cooker.

Well, we have now eaten this.  It was OK.  I wasn't a huge fan of the parsley.  The texture was very good though.  I did like the cheese flavor.  I think this would have been better with spinach.  Would have looked more green as well.  One other note - this cooked a lot faster than it said.  Was ready in more like 3 hours.  It was also starting to burn after 1 hour on high.)


Recipe from Ruth Hofstetter - Versailles, Missouri

Ingredients

  • 1 1/3 cups evaporated milk -(The can measures 1 1/3 cups + 3 Tablespoons.  I used it all.)
  • 2 Tablespoons vegetable oil (while I'm typing I'm thinking I'll be leaving this out.  Plenty of fat from the cheese and milk -I did leave it out.)
  • 3 eggs
  • 1/4 of a small onion, minced (I used a shallot)
  • 1 small carrot, minced (optional -original was only 1/2, but what was I to do with 1/2 a carrot.  I put the whole thing in.)
  • 2 cups minced fresh parsley or 10 oz. pkg frozen chopped spinach, thawed and drained.  I used the parsley.  I got Italian flat leaf and measured out 2 cups of leaves before chopping.
    2 teaspoons salt
  • 1/4 teaspoon pepper
  • 1 cup shredded sharp cheese (I used cheddar
  • 3 cups cooked long grain rice
Directions
  1. Beat together milk, oil, and eggs until well combined.
  2. Stir in remaining ingredients.  Mix well.  Pour into greased slow cooker.
  3. Cover.  Cook on High 1 hour.  Stir.  Reduce heat to low and cook 4-6 hours. (Only needed 2-3 hours.  We turned it off after 3 and it was a bit overdone.)

Sunday, November 7, 2010

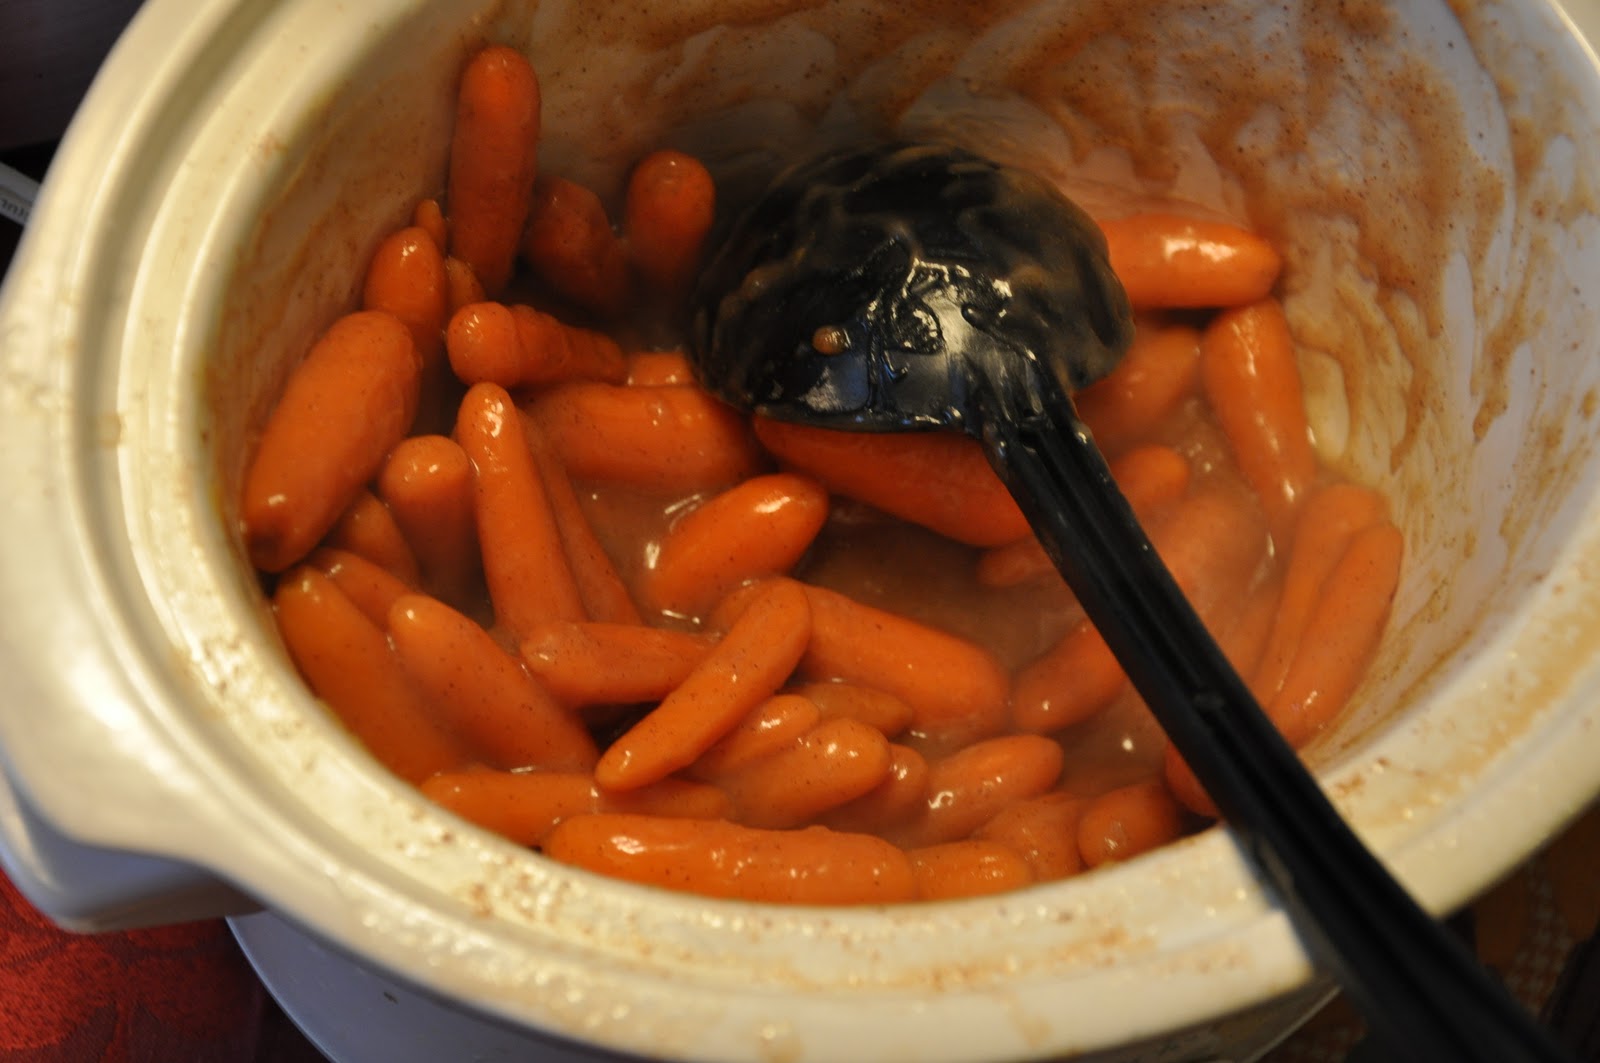
Orange glazed carrots

Here is the side I made to go with the beef San Morco.  I really liked the flavor of it, but it took way longer to cook than it said it didn.  We ended up eating it with the carrots still a bit crunchy.  I think it would have been better if they would have gotten properly cooked.  I had 1 or 2 carrots that were cooked an they were much better.


Recipe from Cyndie Marrara of Port Matilda, PA

Ingredients

  • 32 oz. (2 lbs.)  baby carrots
  • 1/2 cup packed brown sugar
  • 1/2 cup orange juice
  • 3 Tablespoons butter
  • 3/4 teaspoon cinnamon
  • 1/4 teaspoon nutmeg
  • 2 Tablespoons cornstarch
  • 1/4 cup water
Directions
  1. Combine all ingredients except cornstarch and water in slow cooker.
  2. Cover.  Cook on low 3-4 hours until carrots are tender crisp.  (I did 3.5 hours on low and they were very crispy.  I upped my crock pot to high for 30 minutes or so, and it was still crunchy, so I tossed them in the steamer for another 20 minutes or so, and they were still a bit crunchy, but it was way late for dinner so we ate them that way.)
  3. Put carrots in serving dish and keep warm, reserving cooking juices.  Put reserved juices in small saucepan.  Bring to boil.
  4. Mix cornstarch and water in small bowl until blended.  Add to juices.  Boil 1 minute or until thickened, stirring constantly.  Pour over carrots and serve.

Tuesday, November 2, 2010

Orange-Maple vegetable ribbons

So, I had to re log in today because my computer actually shut down, but that made me notice that this is my 500th blog post.  I had to check out when my blogoversary is on Saturday.  Can't believe I've posted that many recipes in a year.  At the same time, I have enjoyed blogging my recipes.  It has been very helpful to me, and I use my blog all the time.  So, it has been worth the time.  I guess I should have chosen a neat dessert for my 500th post or something, but I am too far behind in my blogging right now to even think about that.  Maybe I'll do something special for my blogoversary.
So, enough blog stuff and on to my post for today (even if my mind is still turning over ideas for a blogoversary post.)  These are the vegetables that we had with potato crusted snapper last night.  The recipe is from my simple and delicious magazine.
After making these I have a strong opinion against vegetable ribbons.  I swear I've tried them before, and they haven't been too bad, but last night I was shredding 3 carrots, 1 zucchini and 1 yellow summer squash.  It was painstaking.  Nothing "Simple" about it.  OK, the process isn't overly difficult at first.  Just grate away with the vegetable peeler, but then the veggie gets thin and hard to hold onto, and flies across the kitchen (maybe not for everyone, but I had a renegade carrot that wanted to take flight.)  Then you have to repeat the process 5 times.  Then the squash cooks way faster than the carrots, and they are hard to stir, and as you stir the veggies, the squash starts to fall apart and doesn't much look like ribbons anymore, so why on earth did you bother with all of that peeling in the first place????  My picture surely doesn't look as cute as the one in the simple and delicious magazine.  They cave these cute little ribbons of veggies - very nice.  Mine was like a blob of veggies.  I don't think I will try to ribbon cut veggies again (at least until I forget what a pain it was.)
So, on the plus side, I really liked this dish.  It actually was super tasty.   If I make this again, I would definitely just slice the zucchini and the squash, and probably julienne cut the carrots (in my food processor not by hand.)  I think that would help the carrots help cook as fast as the squash.
Other than the ribbon business, I loved these veggies.  The sauce was definitely delicious.  I loved the maple flavor with the orange on veggies.  The pecans added a nice nuttiness.  (even though I totally forgot to put them on until the last minute and I didn't toast them.


Ingredients

  • 1 large zucchini
  • 1 large yellow summer squash
  • 3 medium to large carrots
  • 1 Tablespoon butter (I think I actually used a bit less -it was a very thin Tablespoon)
  • 1/4 cup maple syrup
  • 1 Tablespoon orange juice (I squeezed it from the orange I zested)
  • 1/2 teaspoon grated orange peel
  • 1/4 teaspoon salt
  • 1/8 teaspoon pepper
  • 1/4 cup chopped pecans (we didn't measure this, I just sprinkled them on the pecan loving peoples veggies.)
Directions
  1. Using a vegetable peeler, cut vegetables into very thin lengthwise strips.  (Or just chop the zucchini in slices and dice or julienne cut the carrots.  It is what I will do next time.)
  2. In a large skillet, saute the vegetable strips in butter until tender.  Remove and set aside.  In the same skillet, combine the syrup, orange juice and peel, salt and pepper.  Bring to a boil;  cook for 2-3 minutes or until most of the liquid is evaporated.  Return veggies to the pan and toss to coat;  Sprinkle with pecans.

Tuesday, October 12, 2010

cranburgers with sweet potato fries

This recipe comes from my taste of home magazine.  I changed it up some, but not much.  I used chicken which I ground myself in my grinder attachment for my kitchenaide.  I also used 3 medium sweet potatoes rather than a package of frozen sweet potato fries.  It worked out well.
I did burn the burgers, and I even turned the heat down, so really watch that.  I think it was something about the cranberry sauce in them or something.  It also made more like 7-8 patties, which was fine.
The flavor was decent.  I wasn't a big fan of the cranberry sauce on the burger because it made my bread soggy.  I did however like the flavor and ended up spreading it on bite by bite as I ate the burger.
While I liked this to be different, I prefer a regular burger.
I did really like the sweet potato fries.  I always like sweet potato fries.  These had a new seasoning and I really liked it.  I doubled what the original called for and did not use all of it, but I did use more than 1/2 of it, so I'd double it again next time.  I did have to spray them a couple of times to get them to crisp up, and still they were not all that crisp.  Next time I think I would probably toss them in a Tablespoon of oil, then toss them in the seasonings (which would help use all of the seasoning), then cook them, but again, I was using regular sweet potatoes and the original recipe called for prepared frozen, sweet potato fries.  One of mine was a bit large so I didn't use all of my sweet potatoes but that was because I really only wanted 1 tray of fries.
I'm leaving the instructions together because it worked well to make them together.  The fries cooked while working on the burgers.
Here is what I did.

Ingredients

  • 3 medium sweet potatoes, cut into french fries (or 1 16 oz. pkg frozen french fried sweet potatoes.)
  • cooking spray
  • 2 teaspoons pesto sauce mix
  • 1/2 teaspoon celery seed
  • 1/2 teaspoon ground thyme
Burger Ingredients
  • 1 cup whole berry cranberry sauce
  • 1 cup chicken flavor stuffing (I used stove top)
  • 1/4 teaspoon ground thyme
  • 1 1/2 lbs ground turkey (I used chicken.)
  • 1 Tablespoon canola oil (I omitted this, but I burned my food.  You may want to use it.)
  • 6 lettuce leaves
  • 6 buns (I forgot to make some, so we used bread
  • 1/3 cup turkey gravy (I used a packet that I whipped up - it was chicken too.)
  • 6 slices jellied cranberry sauce
Directions
  1. Preheat oven to 400.  Place fries on a greased cookie sheet.  Spray with cooking spray.  Combine pesto, celery seed and thyme; sprinkle over fries.  I turned them over to sprinkle both sides.  (Next time I'd put the sweet potatoes in a big bowl, toss them with 1 Tablespoon oil, and then sprinkle/toss them with the pesto mix.)  Bake for 20 minutes, turning once in the middle.  (I'm pretty sure I cooked them more than 20 minutes, but I had fresh sweet potatoes.  I just cooked them however long it took me to make the burgers, checking on them occasionally.
  2. Meanwhile, in a large bowl, combine the whole-berry cranberry sauce, stuffing mix and thyme.  Crumble turkey over mixtre and mix well.  Shape into 6-7 patties.
  3. In a large skillet, cooke burgers in oil over medium heat for 6-8 minutes on each side or until a meat thermometer reads 165 and juices run clear.  
  4. Place burgers on lettuce lined buns, top with a spoonful of gravy and a slice of cranberry sauce.  Serve with fries.

Friday, October 8, 2010

Feta zucchini pancakes

I found this recipe in my taste of home healthy cooking magazine last month, but just got around to making it yesterday.  I changed it up a bit to work with what I had on hand.  Plus the original called for 1 cup zucchini.  I just shredded 1 medium zucchini and it was 2 1/2 cups so I adjusted accordingly.  These were really good.  I was a bit worried because I'm not the hugest fan of feta, but it was great in this dish.  Probably another cheese that I like better melted.  You could add another 1/4 cup panko, 1 egg, and 1/4 cup feta especially if you have closer to 3 cups zucchini.  You could also use more dill and parsley, but I liked the mix I ended up with.  Original had twice as much parsley and dill.
These were a really fun side.  Great new way to eat zucchini in my opinion.  Yum. (Sadly my zucchini hating husband wasn't home to give an opinion, but both of the big boys loved these.)

Update - 10/21 - Made these again.  This time my zucchini was much more wet.  It does benefit from the drying.  It was also a lot smaller - maybe 1 1/2 cups shredded. I used 1 egg, 1 T egg substitute, 3/8 cup panko, 3/8 cup feta, 1 teaspoon dill, 1 teaspoon parsley (dried for both) 2 teaspoons dried onions (I was in a hurry can you tell.)  It was still great, I thought it was a bit heavy on the dill though.

Ingredients

  • 1 medium zucchini, shedded (about 2 -2 1/2 cups)
  • 1/2 cup panko bread crumbs 
  • 2-4 green onions (I only used 1, but then tossed in some dehydrated onion as well.)
  • 2 eggs 
  • 2 Tablespoons minced fresh parsley (purposely made this less)
  • 1 teaspoon dried dill 
  • 2 garlic cloves, minced
  • 1/2 cup feta
  • 1-2 Tablespoons olive oil, divided
Directions
  1. In a sieve or colander, drain zucchini, squeezing to remove excess liquid.  Pat dry.  (My zucchini wasn't super wet or anything.  I shredded it with the thicker side of my food processor.  I put it in a colander, and pushed down on it with a paper towel, but it didn't do much.)
  2. In a small bowl, combine eggs, bread crumbs, onions, parsley, dill, and garlic.  Stir in zucchini and cheese.
  3. Heat 2 teaspoons of oil in a large nonstick skillet over medium heat.  Drop batter by heaping tablespoonfuls into oil;  press lightly to flatten.  Fry in batches until golden brown on both sides, using more oil as needed. 

Tuesday, September 28, 2010

Panera broccoli cheddar soup

This is what we had with the chicken fingers.  The recipe again comes from my sister Karley.  My boys automatically think everything from Karley is wonderful because she gave us cafe rio pork, and that is a favorite of theirs.
This too was tasty.  I did lighten it considerably.  I used 1/2 the butter it called for and I used fat free half and half.  I have actually laughed at the fact that they make a fat free half and half when I have seen it in the store.  While I wouldn't try it for ice cream, I didn't think it would change the quality of a soup too much, and it cut the calories from the cream in half.  The soup turned out good.  Again, everyone with taste buds :) liked it.  Aaron first used it to decorate his chicken finger.  Benjamin complained about it, but everyone else wanted more.  I thought it was a nice change to a regular veggie dish.  I'm writing this how my sister gave it to me with what I did in parenthesis today.

Ingredients

  • 6 Tablespoons butter (I used 3)
  • 1 small onion, chopped 
  • 1/4 cup flour
  • 2 cups half and half (I used fat free)
  • 1/4 teaspoon freshly grated nutmeg (I actually freshly grated my nutmeg - so proud.)
  • salt and pepper to taste - I used 1/4 teaspoon of each
  • 2 bay leaves
  • 4 cups broccoli florets
  • 1 large carrot, diced
Directions
  1. Melt the butter in a large dutch oven or pot over medium heat.  Add the onion and cook until tender, about 5 minutes.  Whisk in the flour and cook until golden, 3-4 minutes (I only did this for 1 because I had less butter so it was a more pasty mixture.)  Gradually whisk in the half and half until smooth.  
  2. Add chicken broth, bay leaves and nutmeg then season with salt and pepper and bring to a simmer.  Reduce heat to medium-low and cook, uncovered until thickened, about 20 minutes.
  3. Add the broccoli and carrot to the broth mixture and simmer until tender, about 20 minutes.
  4. Discard the bay leaves.  Puree soup in batches in a blender until smooth;  (I used my immersion blender and just did short bursts until it was the consistency I wanted.)  If using a blender, return to pot and add cheese to the soup and whisk over medium heat until melted.  Add up to 3/4 cup water if the soup is too thick (I thought it was thick, but fine.  I added no water.)

LinkWithin

Related Posts with Thumbnails